Felicity from Thin Air: Inviting creativity, imagination, and play in the classroom

The following is a re-post from my other blog: iPad Curriculum.  I shared Send Felicity a few weeks ago as part of my advent collection but thought I would give everyone a little more information about this incredible site and invitation for play.  Even though Send Felicity has an iPhone/iPod Touch app, the app isn’t necessary to engage in the creative play which is also available on the Send Felicity website and Facebook page.  I encourage you to offer your students opportunities for play.  I deeply believe that play is a strong catalyst for learning.

Application/website: Send Felicity

What it is: Everyone could use a little more magic and enchantment in their lives and Send Felicity brings students (and teachers/families) just that.  Take a look at the video below to watch some of that magic unfold.

Felicity is six and three-quarters years old.  She loves imagination, making things, and magic.  She comes from a magical place called Thin Air. Felicity invites children everywhere to join her in play.  Every day there is a new special surprise waiting for children.  Each surprise invites students to engage in creativity, play, imagination, and learning.  It is an enchanting-ongoing place that involves technology, imagination, and the real world in new ways.  The artists, geeks, and minds behind Felicity are deeply committed to keeping the childhood experience one of magic, imagination, and exploration.  They bring these values to life beautifully as an application, website, and social experience.  What I love about the Send Felicity experience is the storyline behind Felicity, and the invitation to be part of something that is engaging, meaningful, and magical.  The combination of the three makes Send Felicity a unique learning and interactive experience.  So, how does Send Felicity work?  Children can visit the application or website to learn of a new craft (adventure) to take with Felicity.  Felicity takes every day objects like paper plates and makes them magical.  Children follow the adventures and create and pretend along with Felicity.  Children can take pictures of their finished masterpieces and upload them to the Send Felicity website, sharing the creative experience with others.  The application is truly unique and takes what is real and adds a bit of magic (as you saw in the video).

How Send Felicity can enrich learning: Play is an important part of learning. It provides the building blocks for self-regulation and executive functions, promotes creativity, imagination, and divergent thinking.  Unfortunately play is often stripped from the classroom.  Send Felicity weaves together a wonderful tapestry of play and learning in the form of an application, a website, and a social movement.  Felicity uses open-ended play and experimentation that leads to an attitude of fun learning.  Felicity helps your students turn ordinary objects into creative works of magic.  Use Felicity’s daily dose of magic to spark your students imaginations.  Set aside some time for your students to do a little creative play.  The benefits that play has on the rest of the learning day will be well worth the time invested.   Go beyond the crafts and invite your students to write stories, poems, or secret letters in connection with the imaginative play of the day.   Activities for Felicity are open-ended and include art, language arts, literacy, and even math and physics.   Send Felicity marries technology and real life in new fun ways.  The application is just a piece of the bigger picture.  The application takes students physical creation and adds a little magic to it.

Send Felicity is really an app all about engagement of the mind.  As an example, one of my personal favorite Sending Felicity projects Beautiful Oops:

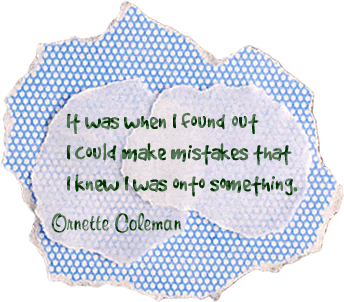
Today we are boldly making mistakes.Today, our children will make a small mess.

Today, we’ll set out on an adventure and begin with an “oops” and end up in a place where we can look and wonder. Together, we can do something mistaken and wrong; and audacious and wonderful to surprise everyone.

This project shows children that it is okay to make mistakes, and that, in fact, those mistakes can be turned into something wonderful, new, and meaningful.  Students don’t hear often enough that it is okay to make mistakes and that it is indeed an important part of the learning process.  Take a look at what these beautiful oops turn into:

The Send Felicity App has not yet been released to the iTunes store, but don’t let that stop you from using Felicity in your classroom right now, the Send Felicity website is full of fun activities, instructions, and even a bit of magic.  You can also check Felicity out on Facebook where she shares creations made by children from around the world!  Send your students home with a wonderful gift this holiday season and point them toward the Send Felicity website. Students will love the opportunities for play and imaginations, parents will love the ideas to keep their kids learning and playing.  Let parents know about Send Felicity along with this article from Geek Mom for a little explanation.

The wonderful people over at Send Felicity are so passionate about creating a world of wonder and imagination for children to play in that they have made the technology that Send Felicity is based on open source.  Interested parents, educators, and developers are invited to sign up to play along with them.

Devices: Compatible with iPhone, iPod touch iOS 3.1.3 or later

Price: Free!

14 Online Interactive Advent Calendars

It is December again, which means the beginning of Advent.  Advent calendars are a fun way to reveal information and “surprises” for your students to look forward to each day in December leading up to Christmas.  This year I thought I would make an advent calendar of my own using Wix.  I created a Web 2.0 advent calendar by choosing 25 of my favorite web 2.0 tools for the classroom.  Each day you can check out a new one.  (I’ll let you in on a secret, you can cheat and look at them all by clicking on the bird to get back to the calendar page…shh don’t tell anyone!)  You and your students can create your own custom advent calendar like I did using Wix.  Students can create an advent calendar of pictures of their school work, trivia for their parents, special audio notes, or anything they are learning.  To create your own Wix advent calendar, choose a template, add shapes to the template to create your calendar pieces, add 25 pages to the site, add links to those pages.  You could also create an advent calendar of your own using Glogster.  Create a customized advent calendar for your students with fun surprises, quotes, video clips, sound bites, etc.  It can be related to the learning they are doing in your classroom, suggestions of books to read,  or reveal special rewards like extra computer time, time playing a favorite game, time for reading, etc.  Be creative!

Woodlands Jr has a great online advent calendar every year that tests students knowledge about Christmas around the world.  The Woodlands Jr. 2010 advent calendar is now up and ready for viewing! This is a fun way for students to test their knowledge and learn about the ways that Christmas is celebrated all around the world.  As an extension, plot the places around the world that they are learning about on a world map.

BBC Radio has a fabulous Bach advent calendar. Each day your students can listen to a story about Bach or music.

The National Museum of Liverpool has an advent calendar that reveals a piece of art from the museum each day.

The Dirt Dirt advent calendar is purely fun, each day click on a number and an animation will be added to the tree.

For those of us who are app inclined, you can download a free app for your iDevice every day from Appvent Calendar.

Below you will find my interactive advent calendar finds from last year.  You are bound to find one that is a perfect fit for your class!

What it is: It is December!  This means the beginning of Advent along with the anticipation and excitement that it brings.  The Internet is full of interactive advent calendars that you can use in your classroom to teach about how the Christmas season is celebrated all around the world.  These advent calendars reveal fun facts, interactive activities, and stories.

Santa’s House Advent Calendar– This advent calendar tells a fun story.  Each day reveals another secret about what goes on inside Santa’s home on the 24 days leading up to Christmas.  In each picture, there is a little mouse hiding.  When students click on his ears, he jumps out.

Picture 1

Christmas Around the World Advent Calendar– Each day students click on the date to reveal a fun fact about how countries around the world celebrate Christmas.  The facts are accompanied by great illustrations and pictures.  This site shows up very small inside my Internet browser (Firefox).  To remedy this problem, click on “view” in your menu bar and choose “zoom”.  You may need to zoom in several times.

Picture 2

Christmas Mice Advent Calendar– This calendar tells the story about a mouse family who celebrates Christmas.  Each day a little more of the story is revealed.  Each picture includes some animation.

Picture 3

Santa’s Advent Calendar– On this advent calendar, each day reveals a new song or activity for students to complete. There are some fun Christmas themed mysteries to solve, stories to read, and activities to work through.

Picture 4French Carols Advent Calendar–  This is a French advent calendar.  Each day contains a new French Christmas carol sung by children.  This advent calendar would be a fun one to include in a study of Christmas around the world.

Picture 5

Christmas Around the World Advent Calendar Quiz–  This advent calendar tests students knowledge about how other cultures celebrate Christmas.  Each day students are asked a question and given hints to help them answer.  When the answer is revealed, students can click on links to learn more about the Christmas celebrations in that country.  This site also includes great activities and teaching resources for Christmas.

Picture 6

Christmas Advent Calendar– Follow the adventures of Zac the elf as he tries to find a Christmas present for Santa.  Each day a little more of the story is revealed.

Picture 7

Christmas Activity Advent Calendar–  This advent calendar has fun little games and activities to play each day.  The games and activities are quick and easy to complete, building mouse and keyboard skills.  This advent calendar would be a good one for the classroom computers as a center activity.

Picture 8

How to integrate Interactive Advent Calendars into the classroom: The season of Advent is always filled with eagerness and expectancy. Build some of that anticipation into your school day by allowing students to unlock a new secret on the advent calendar each day.  Use these advent calendars with the whole class on an interactive whiteboard or projector, or set them up as a quick center activity that students can visit.  Use the advent calendars that reveal a story to practice looking for foreshadowing clues, using context clues to guess what will happen next, or as story starters for students own stories.  The Christmas around the world advent calendars are wonderful for teaching students some of the history of Christmas and the way that other cultures celebrate the familiar holiday.

Tips: Each of these advent calendars has some fun goodies and hidden surprises, find the one that best fits your classroom needs.

Leave a comment and share how you are using Interactive Advent Calendars  in your classroom.

The Pre-Raph Pack

What it is: The Pre-Raph Pack (don’t you love that name?) is a brilliant site about artists, the techniques they used, a timeline that spans 100 years, and a collection of images from the Birmingham Museum and Art Gallery.  First students discover the Pre-Raphites (that is artists who were before Raphael).  Students will learn about the influences, the different styles that emerged, the early and late style and the lasting influence that these artists have.  Students can learn more about the individual artists which are easily categorized and searched by last name.  Next, students can learn about the different painting techniques that were used from the wet-white technique to the use of bright and vivid colors.  The timeline lets students explore each time period of the almost 100 year Pre-Raphaelite movement.  Finally, students can see the collection of paintings themselves.  The collection is easily searchable by category.

How to integrate The Pre-Raph Pack into your curriculum: The Pre-Raph Pack is a comprehensive look at the Pre-Raphael art movement and the collection at Birmingham.  Students not only get a peek at the artists themselves, they learn the history, technique, and what the movement meant to art.

This is a well put together site for use in any art class, but the in-depth look at the artists and the history makes it a great site for any classroom.  Art is a medium that can absolutely hook a child on history. They begin to see that art has gone through evolutions and that it is deeply reflective of the times.  If you have a student who is struggling with history, introduce them to a little art history and see if you can’t help them make different connections with the stories.  I have said this many times before, but history was a hard subject for me.  I saw it only as a collection of dates, facts, places, and names that I couldn’t get to relate to each other.  It wasn’t until I met my husband and he started talking history, that I realized that history is all about story.  The Pre-Raph Pack is a site that can help your students begin to connect the pieces in history.

Use the paintings on this site as writing prompts, ask students to write about the story they think is happening in the painting.  The collection includes everything from history and medieval, to religion and myth, to portraits, literature, and landscapes.  Each of your students will be able to find a painting that speaks to them.

Tips: The Pre-Raph Pack was created for the Birmingham Museum and Art Collection.  They have several excellent websites that I will be reviewing.

Please leave a comment and share how you are using The Pre-Raph Pack in your classroom!

Flixtime: Video slideshow creator

What it is: Flixtime is an online tool that lets students create 60 second video slideshows.  Slideshows can contain videos, pictures, text and music. The interface of Flixtime is easy to use; it looks a lot like the timelines used in iMovie and would be a great way to introduce students to the idea of video timelines and a separate sound track.   With Flixtime, students can adjust the screen resolution of their video and choose a speed for their slideshow to play.  As I used Flixtime, I couldn’t get over how much like Animoto it is.  If you need an alternative to Animoto, this is your tool!

How to integrate Flixtime into your curriculum: Flixtime is a great tool for telling a story.  Students can use Flixtime to tell a story about their learning, to illustrate a science experiment, to create a video timeline of a historical event, to illustrate vocabulary, to create an auto-bio poem, or to create a custom public service announcement.  Flixtime is an easy way for students to create something new and demonstrate understanding on any topic.  My students have used video slideshows to create math story problems for a buddy to solve, they turn out great and sure beat the dry story problems from math textbooks!  Flixtime videos can be saved on the student Flixtime account, embedded in a class blog/wiki/website, emailed, and even downloaded!

Tips: Flixtime requires an email account for sign up.  The email account doesn’t need to be verified which means that students can sign up with a temporary email account from tempinbox or mailinator.  If you teach elementary students, create a class Flixtime account where students can create and save videos.  This ensures that you know what is being posted and puts the videos all in one place for easy viewing.

Please leave a comment and share how you are using Flixtime in your classroom!

Picture a Story: Digital Storytelling

What it is: As I mentioned a few days ago, I am starting a virtual classroom/club for digital storytelling.  I have been on the lookout for great resources, I listed my favorites here, and now I am remembering a lot of tools I left off of my original list (like Toon Doo!).  Today as I was going through my Google Reader, I learned about this gem from Richard Byrne’s Free Tech for Teachers.  The Delaware Art Museum has provided a great website dedicated to storytelling.  The tagline is “bringing visual art to life through stories”.  On the site, students can picture a story, experience a story, or tell a story.  The Picture a Story was the most intriguing portion for me, as it provides a great tool for telling a digital story.  First, students choose a genre of story that they want to tell, next they choose a famous painting background for their story, students add characters (also from famous works of art), props, and then tell the story.  In the tell the story section, students type out the story.  If a microphone is available, students can even record the story in their own voice.  When students have completed their story, it can be shared via email.

How to integrate Picture a Story into your curriculum: Stories are powerful.  I love the way that Picture a Story weaves together famous works of art with story.  It teaches students to reflect on the art that they encounter and think about the stories that it represents. Picture a Story is a great way to discuss genre, characters, and parts of a story.  It is also a fantastic way to bring a little art history into your classroom.  It would be a neat class experiment to have students choose all the same genre, background, characters, and props and, without talking to others, write their story.  After students are finished they can share their stories with the class.  Students will learn about perspective, creativity, and voice as they listen to all the different stories that originated from the same picture.  If you don’t have access to a computer lab, this activity could be done with an interactive whiteboard or projector connected computer and students writing on paper.  Let your students experiment with story and share their finished pieces with each other.  Picture a story is ideal in a lab setting where each student has access to their own computer.  If that isn’t a possibility, you could also have students visit Picture a Story on classroom computers as a storytelling center.  The site is quick to navigate through and students can tell a story in a sentence or a few paragraphs making it a good center.  If students don’t have access to email or can’t email the finished product to you, have them take a screenshot of the story to save in a digital portfolio or to print out.

Tips: The teacher section of this site has some great lesson ideas for every grade level.

Please leave a comment and share how you are using Picture a Story in your classroom!

31 of My Favorite Digital Storytelling Sites

I am working on starting a virtual classroom…actually when it is all said and done, it will look more like a virtual club.  I have opened up my virtual classroom to students in 3rd-8th grade.  My first offering is going to be digital storytelling.  In honor of that, I thought I would share the sites I am going to use with the students, as well as some other favorites for digital storytelling.

1. Google Search Stories Video Creator– This is a YouTube site that lets you create a digital story out of a series of Google Searches, you really have to check it out to get the full effect!

2. PicLits– This is an all time favorite of mine, PicLits lets students choose a picture and then draw from a word bank to create a sentence or story to accompany the picture.

3. Domo Animate- This is my favorite story animation tool.  It gives students so much flexibility and freedom in telling their story, the results are amazing!

4. StoryBird- This site lets students create stories based on beautiful illustrations by real artists; better yet, it lets students create stories collaboratively!

5. Animoto– The free version of Animoto lets students create 30 second videos that combine images, songs, and text. It combines them all for an impressive presentation without a lot of fuss.

6. ZooBurst- ZooBurst is one that I haven’t used with students yet but I am excited to.  ZooBurst is a new site that lets students create virtual 3D popup books.  Even better, it lets students print out a special marker and view their popup book augmented reality style as it comes to life using a webcam!

I couldn’t fit in all of my favorite digital storytelling tools into a 5 week class, here are some more favorites:

7. Myths and Legends

8. Shidonni– One of my students very favorite websites of all time, this one gets requested a lot!

9. Smile Box

10. Kerpoof– another student favorite!

11. Glogster

12. Creaza

13. Voice Thread

14. Graphic Novel Creator- Comic Master

15. Stage’d

16. ePub Bud– publish ebooks for ebook readers like the iPad

17. Virsona– a different kind of digital storytelling but neat none the less!

18. Zimmer Twins– one of my students very favorite ways to tell a story!

19. Fotobabble

20. Picture Book Maker

21. Nota– collaborative workspace

22. My Story Maker

23. Xtranormal

24. Do Ink

25. Piki Kids Comic Creator

26. Bubblr!

Sites to get students writing:

27. Lightening Bug

28. What-if questions for stories

29. The Story Starter Jr. -Created by my friend Joel Heffner!

30. The Story Starter- Also created by Joel!

31. PinBall-bounce ideas around

Pinball: Bounce Ideas Around

What it is: Pinball is a neat site from the BBC that helps students kick-start new ideas to get thoughts flowing and develop creative talents. There are four tools that will help students brainstorm and bounce ideas around. Dot Dash is for firing out ideas, start with a main idea and branch out with connected ideas in a web.  Drop Zone is for making quick decisions, add ideas, name the zones, click “go”.  As ideas speed by, quickly make a decision and select a zone; analyze the results.  Snap Shot lets kids play with images; here they can upload an image or select a random image or word in “Lucky Dip” and then use the tools to play with the idea. Students can reflect, rotate, scale, bend, erase or cut an image or word to get different effects.  Wild Reels is for mixing up ideas.  Students can create reels of images and words, then they can label the reels.  When the ideas are all in, the ideas can be “spun” to see what combination comes up.  In each of the tools, the results can be “flipped” to another Pinball tool.  Each tool allows students to think about a subject and explore ideas they may have about the subject.

How to integrate Pinball into your curriculum: Pinball is a fantastic tool to help kids think through their ideas for writing, research, science hypothesis, making connections in their learning, brainstorming, and fleshing out ideas.  Each tool is designed to let students think visually in a way that lets their ideas flow freely.  The integration of one tool with another is really helpful for transferring loosely related thoughts into a more cohesive thought process.  Pinball can be used for whole class thinking with an interactive whiteboard or projector connected computer.  For example, as students read about a time period in history, and related events, they can use Dot Dash to show how the events and people are related.  Students can each add to the class understanding of the time period.  Drop Zone would be a great way for students to generate ideas for a creative writing, or journal project.  Students can enter the ideas they have and let Drop Zone help them decide which to write about.  Bookmark Pinball on classroom computers so that students can use them as an inspiration station center.  Any time your students need to bounce ideas around or think through their learning visually they can visit Pinball and work through their ideas.  Pinball would also be helpful for structuring thinking prior to a research report, or science experiment.  If you have access to a computer lab or 1-to-1 setting, allow your students time to think about their learning and connect new learning to knowledge frameworks they have already built.  The possibilities with these tools are endless.

Tips: Pinball offers links to additional thinking tools that are available on the web including Exploratree, Mind Tools, bubbl.us, Aviary, Mind 42, and Wisemapping.  Each of these tools is fantastic for mind mapping, creative thinking, brainstorming, and visualizing ideas.

Please leave a comment and share how you are using Pinball in your classroom!

Read Me

What it is: Do you want your students to become deep thinkers?  Read Me is an incredible set of engaging resources that will have your students thinking deeply about who they are and how learning and thinking is vital to their life.  The resources have been designed to reach 11 to 14-year-old boys, to excite them about reading in and out of the classroom.  I can tell you that as a girl, I am enjoying these resources just as much,  I think that would be true of girls in the 11 to 14 age range as well.  Read Me (by the National Schools Partnership) has created six modules that connect with students at their interest level and teach them how to be reflective, deep thinkers and learners.

This is me- covers an understanding of autobiographical texts in traditional (diary) and modern (blog) contexts.  This is me includes teachers notes and presentations that will help students to explore autobiographical texts and self-expression through blogging.

Sport & me- asks students to explore sports websites and media texts by analyzing their structure and presentation.  Students take on the role of a persuasive sports person and ultimately create their own report or website.

Love 4 me- helps students explore different types of love by using texts from a variety of time periods and genres (including images, short extracts, music, lyrics) as well as in Romeo and Juliet.  Students engage with a range of texts that are thematically linked by love.  The culminating activity here is for students to create their own chat show and to create a collage based on love.  (I’m not sure if 11-14 year old boys would be into this topic…but this one will hook the girls for sure!)

Film + me- students use film trailers and titles to develop an understanding of how meaning is created through a combination of words, images, and sounds.  After students have analyzed film trailers and titles, they are asked to present a novel as a trailer.

Graphics 4 me- this one is my favorite because it comes with an awesome graphic novel tool (learn about it here) Here students explore how graphic novels work and become familiar with the medium and its complexity.  Students can create their own graphic novel online using this tool.

Music in me- students explore songs, their lyrics, and the impact they have on their audience.  As a result, students understand how society is presented through music and the media and stereotypes and attitudes it can help to perpetuate.

How to integrate Read Me into your curriculum: There is so much learning that will happen as a result of these six modules, but at the heart of Read Me is a goal to excite kids about reading.  Read Me has incredible ideas and resources for the language arts/literature/literacy classroom.  Use these resources to connect your students with story, passion, and understanding of how language is used.  There is something for every kid to connect with here.  Each module contains teachers notes, resources, links, and tips.  This is a truly incredible resource and collection for this age group.  Read Me encourages students to understand, analyze, evaluate, apply, and create.

Tips: This site includes a graphic novel creator.  I am writing about it separately because it deserves its own post.  You can find it here.

Please leave a comment and share how you are using Read Me in your classroom!

The Write-n-ator

What it is: New Hampshire Public Television has created a great site based on the PBS Word Girl show. I learned about the site from a blog that I look forward to in my Google Reader every day, The Book Chook. The Write-n-ator site features video clips about words and vocabulary for students to watch; after completing the clip, students are offered a related writing challenge.  The clips and challenges are all related to writing, word recognition, and vocabulary development.

How to integrate The Write-n-ator into your curriculum: The Write-n-ator highlights words and vocabulary through fun videos and writing challenges starring the PBS character Word Girl.  Offer these challenges to your students as a class using a projector or interactive whiteboard.  Watch the video clip and create a class response to add to the challenge.  Alternately, each student can take the challenge in a writing journal.  These videos and challenges make for a fun introductory activity to use as a writing warm up.  They have the added benefit of introducing new words and vocabulary.  There are 20 videos and challenges total, so these could be a regular feature in your class.  If you have access to a computer for every student, students can complete the writing challenges online and view other students responses to the challenge.

Tips: Click on the “For Teacher” tab next to each mission for the correlated standards that each challenge meets.

Please leave a comment and share how you are using the The Write-n-ator in your classroom!

I have/Who has Free Language Game Downloads

What it is: Lakeshore is an educational store here in the states.  Today they posted links to some free language game downloads for 1st-6th grade.  The downloads are for an I have/Who has card game. For grades 1-2 you will find a beginning sounds game, for 3-4 a fact and opinion game, and for 5-6 a parts of speech game.

How to integrate I have/ Who has into your curriculum: The I have/Who has card games are a fun way for students to practice a skill as a whole class.  Students sit or stand in a circle.  One student begins by reading the statement on their card.  For example, one student might read “I have: Candy tastes sweet.  Who has an opinion about birds.”  The student whose card has an opinion statement about birds answers “I have: Flamingos are the prettiest bird. Who has a fact about exercise?”  Play continues until all the cards have been matched.  I like the I have/Who has games because they require every student to be actively listening and involved in game play.  The game also gives opportunity for the class to discuss why an answer is correct or incorrect.

Tips: If you are looking for another I have/Who has card game, check out my Contractions game here.

Please leave a comment and share how you are using the I have/Who has Free Language Games in your classroom!